
Microsoft has recently rolled out its Office 365 Planner. Here are 15 things you need to know about the new Planner in Office 365.
1. Adding Planner – If you do not see the Planner tile in App Launcher, you need to ask your Office 365 Administrator to assign you a license (they are free).
2. Accessing Planner – Planner can be accessed only if a Planner License is assigned in Office 365. Once a user is assigned a Planner License, they can access Planner in two ways:
a) Via Planner tile in the App Launcher


b) By navigating to tasks.office.com
3. Planner and Office 365 Groups – Planner is powered by Office Graph and Office Groups, and each new Plan created in Planner automatically creates a new Office 365 Group.
Create new Plan

Groups View
Navigate to Groups in Office Admin Center Dashboard, and then,

4. Planner Buckets and Tasks – Each Plan has its own Board, and within each Board, Buckets (groups of Tasks) can be added. Within the Bucket, users can then add work items, or tasks.
Buckets
You can create a new Bucket in a default Plan Board by simply clicking on Add new Bucket.Tasks

A Task is represented by a combination of name, due dates, attachments, categories and conversations associated with it.

Team members receive an email notification whenever they are assigned a new “Card” or task.
5. Views Tasks as a visual Chart – you can select the Chart view to see a graphical representation of Tasks.

6. Menu to Switch to Office 365 Group View – There is a callout (…) from a Plan’s Board to switch to the Plan’s associated Group view, where you can see the Group’s properties, such as Mail, File repository, Mailbox, and so on.

7. Conversation View of Plan – There is a callout (…) from a Plan’s Board to switch to the Plan’s associated Group’s conversations.

8. Calendar View of Plan – There is a callout (…) from a Plan’s Board to switch to the Plan’s associated Group’s calendar view.

9. Members View of Plan – There is a callout (…) from a Plan’s Board to switch to the Plan’s associated Group’s team view.

10. Files View of Plan – There is a callout (…) from a Plan’s Board to switch to the Plan’s associated Group’s file storage location

11. OneNote Notebook – Every Plan has a link to OneNote, which is represented by “Notebook”, and which opens up when a user clicks on it.
12. My Tasks View – This is similar to workflow Tasks, where you switch to My Tasks or Tasks assigned to the logged-in user.
13. Using Planner and Teams – Users can assign their Plan to a Team using the Teams App.
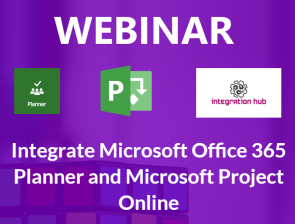
14. Integrating Planner with Microsoft Project Online – If you use Microsoft Project Online and Office 365 Planner, you can install the SharePoint App from FluentPro, Integration Hub, and connect your Planner to Project Online. When you implement Integration Hub, every time you create a project in Project Online, a new, corresponding Plan and Group will be created in Office 365.
Learn more here: http://www.office365planner.info/
15. Influencing Planner development – You can use UserVoice to provide feedback to Microsoft about Planner. https://planner.uservoice.com/forums/330525-microsoft-planner-feedback-forum


0 on: "15 THINGS TO KNOW ABOUT MICROSOFT OFFICE 365 PLANNER"